How to Join Computer to Domain using PowerShell. Active Directory (AD) is a technology that thousands of businesses rely on daily. We must join computers to an AD domain to take advantage of AD. However, we need to realize there are many ways to do that, some better than others. This article teaches us how to add a machine to a domain using the Windows Graphical User Interface (GUI) command line with PowerShell.
How to Join Computer to Domain using PowerShell
Prerequisites
If we want to complete all of the steps in this tutorial, we must have the following items:
- An Active Directory domain.
- A Windows workstation or server with access or connectivity to the AD domain.
- An AD user account with permission to add a computer to a domain.
- Ensure that we install the Remote Server Administration Tools (RSAT) package to use the PowerShell commands.
Joining a Computer to a Domain via the GUI
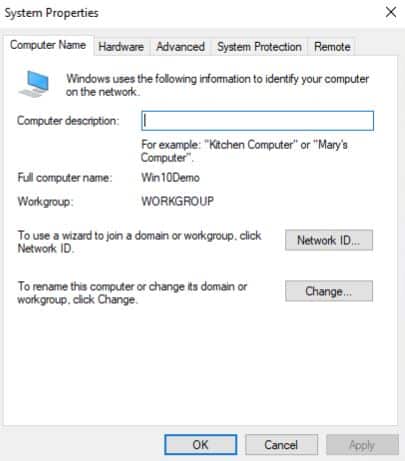
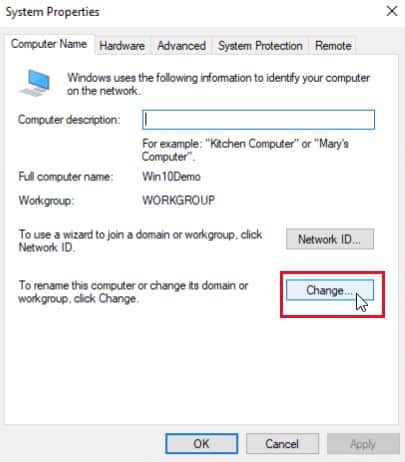
Remember, the GUI is one of the most common methods for adding a computer to an AD domain. This approach is good when we add a single or a few computers simultaneously. However, this method is unsuitable for adding multiple computers simultaneously.
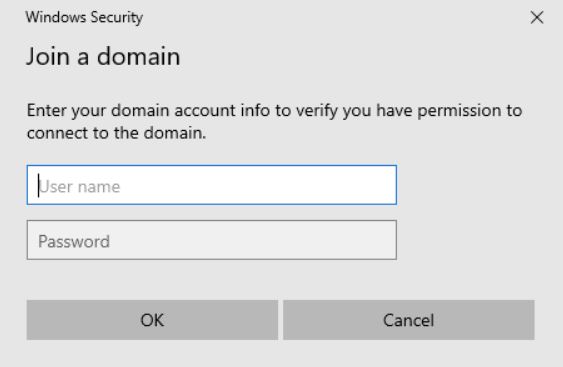
4. To add the computer to the Domain box, enter the domain name and click OK. The computer will then try to connect to a domain controller and join the domain.
Suppose our computer cannot contact the domain name we entered immediately. In that case, it will throw the below error:
If the computer cannot reach a domain controller, ensure the computer’s DNS server points to a domain controller.
The computer must locate the DNS SRV record to locate a DC.
6. If everything goes well, we receive the message below welcoming us to the domain. The computer now creates an AD computer object. Select OK.
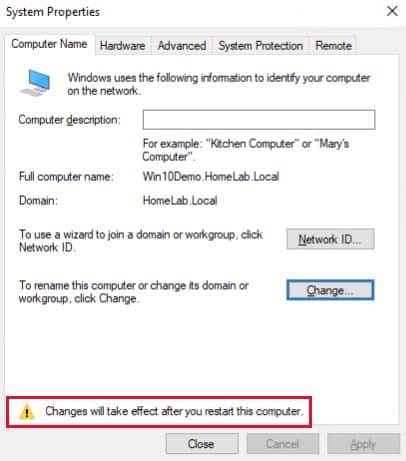
9. When we click Close, Windows will ask us to restart. To restart the computer immediately, click Restart now.
Improve your Active Directory Security & Azure AD
Try us out for Free, Access to all features. – 200+ AD Report templates Available. Easily customise your own AD reports.
Joining a Local Computer to a Domain via the Settings app
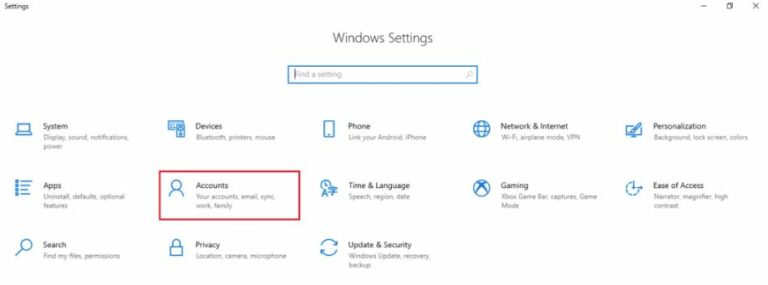
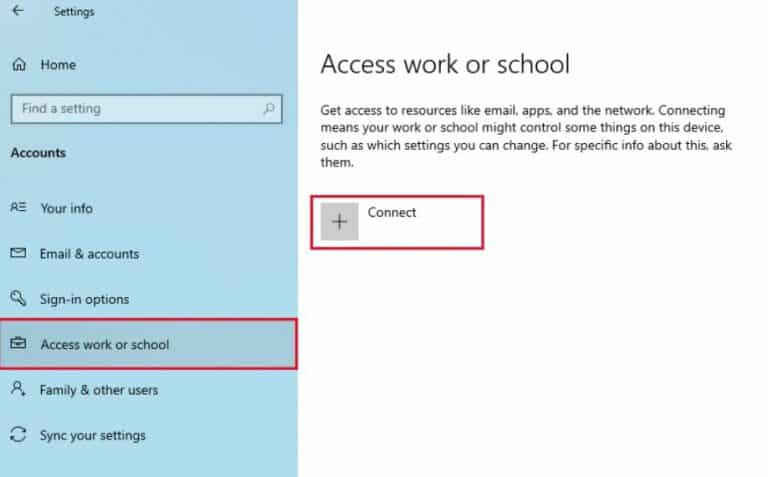
Alternatively, we join a computer to a domain via the settings app using the following steps:
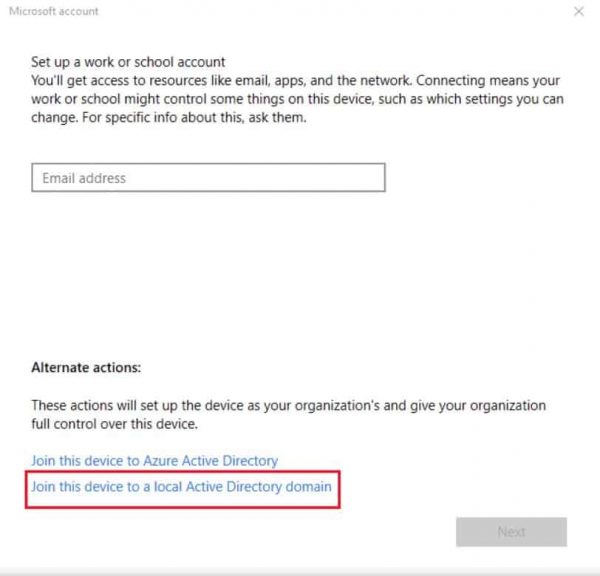
4. Because we will be joining this machine to the local Active Directory Domain, in the Microsoft account dialog box, select Join this device to local Active Directory Domain and click Next.
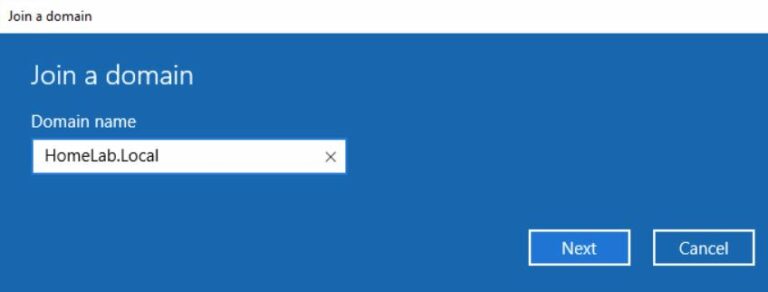
5. Enter the domain name and click Next on the next page.
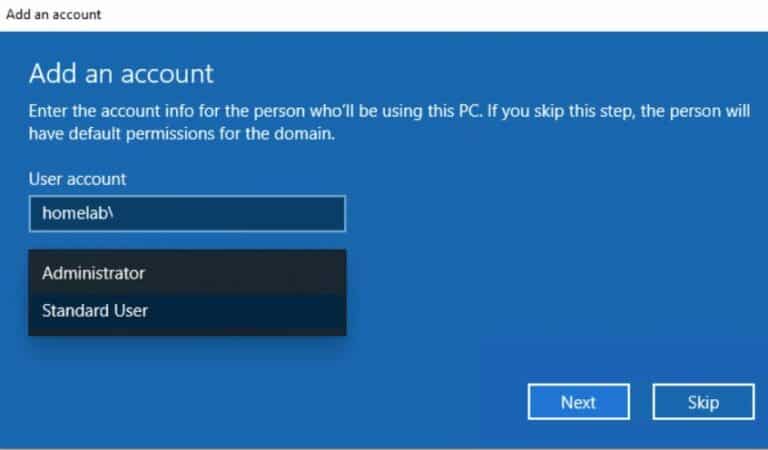
7. On the next page, select the account type that will use this machine.
- If we select Administrator, we will add the user we used to add this machine to the domain to the local administrators’ group on the device.
- Selecting a standard user will not add the user to the local administrator’s group. We can also skip it and continue to the next page.
9. After restarting the machine, we can log in with an AD user id.
Also Read Deploy Active Directory Direct Reports
Joining a Local Computer to a Domain via Netdom
Netdom is a command-line tool that allows us to manage trust relationships between computers. It can join a computer to a domain and perform other tasks, such as resetting machine account passwords and creating trust between domains. Follow the instructions below to join the computer using netdom commands:
1. Start cmd.exe as administrator.
2. Use netdom join with the following parameters.
netdom.exe join %COMPUTERNAME% /domain:DOMAIN /UserD:DOMAIN\USERNAME /PasswordD:PASSWORD
3. Now restart the computer, and the system will join the computer to the domain.
Joining a Local Computer to a Domain via PowerShell
If we have many computers to add to a domain, an onboarding automation process, or prefer the command line, we can use PowerShell. Follow the instructions below to join multiple computers to the domain using PowerShell:
1. Open Windows PowerShell, making sure to run it as administrator.
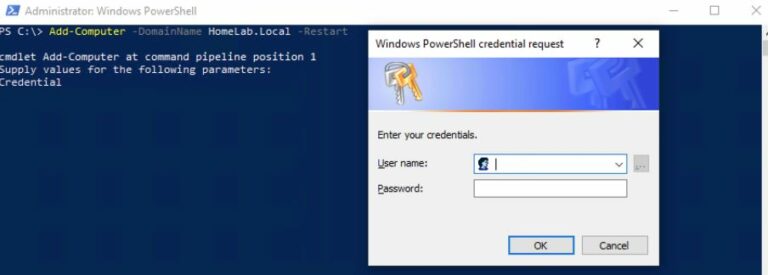
2. Run the Add-Computer cmdlet from the PowerShell console. This cmdlet does the same thing as adding a computer to a domain through the GUI. First, use the DomainName parameter to specify the domain name to which we will add the computer. Then, optionally set the Restart parameter to restart the computer when the process is complete.
We can also specify the Credential parameter to specify the username and password sooner. If we would like to add a computer to a different Organizational Unit (OU) upon creation, select the OUPath parameter. For more options, run Get-Help Add-Computer -Full.
Add-Computer -DomainName DOMAINNAME -Restart
Join a Local Computer to a Domain via WMI
To ensure that this article covers all possible methods for adding a computer to a domain, let’s move on to a less known way of using Windows Management Instrumentation (WMI). WMI is a common component of Windows that contains a wealth of information about a computer and can perform actions on it.
To add a local machine to a domain using WMI, we must call a WMI method. This method accomplishes the same thing as the Add-Computer PowerShell cmdlet. To accomplish this:
1. Start Windows PowerShell as an administrator.
2. Run the command below:
(Get-WMIObject -NameSpace "Root\Cimv2" -Class "Win32_ComputerSystem").JoinDomainOrWorkgroup("DOMAIN.COM","PASSWORD","DOMAIN\USER",$null,3)
3. When completed, restart the computer.
Adding Computers Remotely to a Domain
To add computers to a domain remotely, we could use the WMI method in PowerShell as described above but use the ComputerName parameter on the Get-WmiObject cmdlet or PSRemoting.
To join remote computers to the domain remotely, invoke the Add-Computer PowerShell cmdlet. But this time, use the ComputerName parameter. To run the Add-Computer cmdlet remotely, we must ensure that we enable PSRemoting on all remote computers.
1. Open PowerShell as administrator on our workstation
2. Execute the following command. We may refer to the command below:
- Adds the remote computer to the domain.
- Authenticating to the remote computer uses the local user on the computer.
- The computer account uses the domain account to authenticate to the domain.
- Restart the computer automatically after completion
Add-Computer -ComputerName COMPUTERNAME -LocalCredential DOMAIN\LOCAL -DomainName DOMAIN -Credential DOMAIN\ADMIN -Restart
When we run the Add-Computer cmdlet, it will prompt us for passwords for the local and domain administrator accounts. When finished, PowerShell will automatically restart the remote computer.
By default, the Add-Computer cmdlet will not restart the remote computer if a logged-in user is in session. To override this, specify the Force switch parameter to restart the remote computer constantly.
Thank you for reading this article blog about How to Join Computer to Domain using PowerShell. We shall conclude.
How to Join Computer to Domain using PowerShell Conclusion
In conclusion, using PowerShell to join a computer to a domain is a quick and efficient way to add a new device to your network. By following the steps outlined in this article, you can quickly join a computer to a domain and begin using it as a fully fledged member of your organization. Whether you are a network administrator or simply looking to add a new device to your home network, PowerShell offers a powerful and convenient way to get the job done.
Try InfraSOS for FREE
Invite your team and explore InfraSOS features for free
- Free 15-Days Trial
- Easy Setup
- Full Access to Enterprise Plan


